Quick Start
You've installed and enabled the plugin (or have you?). You have the characters, plot, and the worldbuilding of your story ready, or maybe not, thats ok too.
Lets start by writing a ![]() Dialogue
Dialogue
Writing the Dialogue
Create a new text file in your project. And write your dialogue with the following syntax:
Actor's name:
    "The Dialogue syntax are designed to be human readable,
    similar other data formats like YAML."

Actor's name:
    "You just need the character or actor's name,
    with `:` at the end."

Actor's name:
    "And the dialogue body indented."

Actor's name:
    The quotation marks are also entirely optional,
    everything you wrote is displayed as is.
Save it as *.dlg file. Here we'll save the file as res://intro.dlg. Now that the ![]() Dialogue
DialogueStage.
More on writing Dialogue here.
Setting up the Stage
Nodes & UI
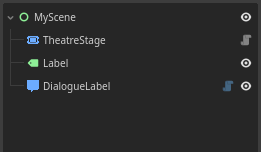
Create a new 2D or User Interface scene. We'll use User Interface scene, which use node for the scene's root. And add the following nodes:![]() Control
Control
 TheatreStage
 Label
Label- and
 DialogueLabel
To tidy things up a little, add , and ![]() PanelContainer
PanelContainer inside it.![]() VBoxContainer
VBoxContainer
And then put the and ![]() Label
Label![]() DialogueLabel
DialogueLabel .![]() VBoxContainer
VBoxContainer
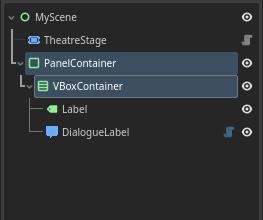
Adjust the size and position of the to your liking.![]() PanelContainer
PanelContainer
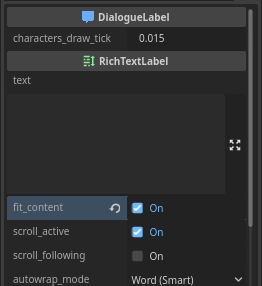
And lastly, make sure that fit_content is set to true on ![]() DialogueLabel
DialogueLabel
Script
Attach a script to the scene's root.
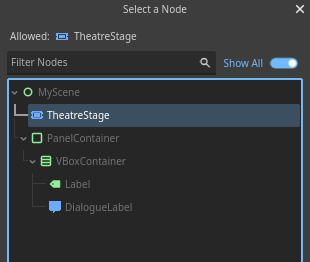
Create a variable with @export annotation to reference the ![]() TheatreStage
TheatreStage'my_stage'.
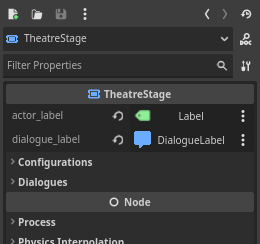
Click the scene's root node, go to the inspector, and assign the ![]() TheatreStage
TheatreStagemy_stage.

Click the ![]() TheatreStage
TheatreStage and ![]() Label
Label![]() DialogueLabel
DialogueLabel
More on configuring Stage here.
Controlling the Stage
Starting
Create another variable to store the ![]() Dialogue
Dialogue'epic_dialogue'. Use Dialogue.load() and pass the path of the written dialogue file.
extends Control

var epic_dialogue = Dialogue.load('res://intro.dlg')

@export var my_stage: TheatreStage
Call start() method on my_stage, and pass the epic_dialogue as the argument to start it.
extends Control

var epic_dialogue = Dialogue.load('res://intro.dlg')

@export var my_stage: TheatreStage

func _ready():
    my_stage.start(epic_dialogue)
Now, the dialogue will start when you play the scene. But we're not done here yet!
Progressing
Progress the dialogue with TheatreStage.progress(). In this example, we'll use _input(event) with Godot's default action key 'ui_accept' (space/enter key).
extends Control

var epic_dialogue = Dialogue.load('res://intro.dlg')

@export var my_stage: TheatreStage

func _ready():
    my_stage.start(epic_dialogue)

func _input(event):
    if event.is_action_pressed('ui_accept'):
        my_stage.progress()
Now, everytime 'ui_accept' key is pressed, the dialogue should progress.
Summary
And, thats it!
Here is how the scene and script should looks like:
extends Control

var epic_dialogue = Dialogue.load('res://intro.dlg')

@export var my_stage: TheatreStage

func _ready():
    my_stage.start(epic_dialogue)

func _input(event):
    if event.is_action_pressed('ui_accept'):
        my_stage.progress()
There's also Minimal Theatre Setup tutorial which is very similar to this article, but a lot more shorter and straightforward.
Next step
- More about writing your
 Dialogue
 - More on controlling your
- Encounter any problems? Check out Common Troubleshooting.